
Requirement
With the RedSleeve Linux release rapidly approaching, I needed a new server. The current one is a DreamPlug with an SSD and although it has so far worked valiantly with perfect reliability, it doesn’t have enough space to contain all of the newly build RPM packages (over 10,000 of them, including multiple versions the upstream distribution contains), and is a little lower on CPU (1.2GHz single core) and RAM (512MB) than ideal to handle the load spike that will inevitably happen once the new release becomes available. I also wanted a self contained system that doesn’t require special handling with many cables hanging off of it (like SATA or USB external disks). I briefly considered the Tonido2 Plug, but between the slower CPU (800MHz) and the US plug, it seemed like a step backward just for the added tidyness of having an internal disk.
Specification
The requirements I had in mind needed to cover at least the following:
1) ARM CPU
2) SATA
3) At least a 1.2GHz CPU
4) At least 512MB of RAM
5) Everything should be self contained (no externally attached components)
Selection
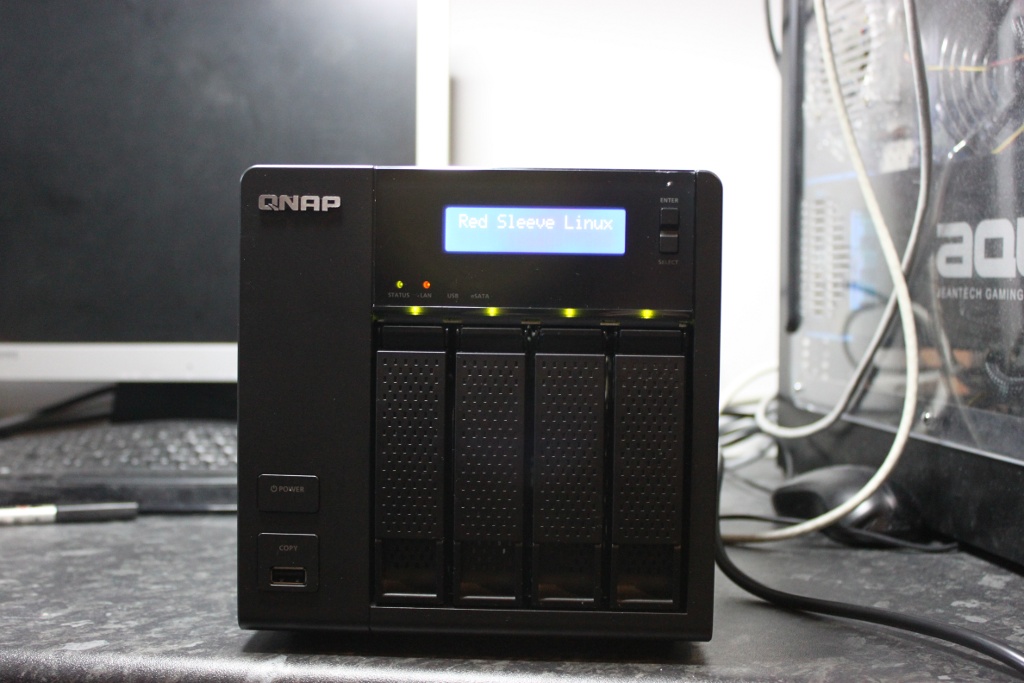
Very quickly the choice started to focus on various NAS appliances, but most of them had relatively non-existant community support for running custom Linux based firmware. The one exception to this is QNAP NAS devices which have rather good support from the Debian community; and where there is a procedure to get one Linux distribution to run, getting another to run is usually very straightforward. After a quick look through the specifications, I settled on the QNAP TS-421, which seems to be the highest spec ARM based model:
CPU: 2GHz ARMv5 Marvell Kirkwood (same as in the DreamPlug but 66% higher clock speed)
RAM: 1GB (twice as much as DreamPlug)
SATA: 4x 3.5″ SATA disk trays, based on the excellent Marvell 88SX7042 PCIe SATA controller
eSATA: 2x
Ethernet: 2x Gigabit (same as DreamPlug)
USB: 2x 2.0, 2x 3.0
Disks
At the time when I ordered the QNAP TS-421, it was listed as supporting 4TB drives – the largest air filled that were available at the time. I ordered 4x 4TB HGST drives because they are known to be more reliable than other brands. In the 10 days since then Toshiba announced 5TB drives, but these are not yet commercially available. I briefly considered the 6TB Helium filled Hitachi drives, but these are based on a new technology that has not been around for long enough for long term reliability trends to emerge – and besides, they were prohibitively expensive (£87/TB vs £29/TB for the 4TB model), and to top it all off, they are not available to buy.
Overview
Once the machine arrived, it was immediately obvious that the build quality is superb. One thing, however, bothered me immediately – it uses an external power brick, which seems like a hugely inconvenient oversight on an otherwise extremely well designed machine.
In order to make playing with alternative Linux installations I needed to get serial console access. To do this you will need a 3.3V TTL serial cable, same as what is used on the Raspberry Pi. These are cheaply available from many sources. One thing I discovered the hard way after some trial and error is that you need to invert the RX and TX lines between the cable and the QNAP motherboard, i.e. RX on the cable needs to connect to TX on the motherboard, and vice versa. There is also no need to connect the VCC line (red) – leave it disconnected. My final goal was to get RedSleeve Linux running on this machine, the process for which is documented on the RedSleeve wiki so I will not go into it here.
Modifying
One thing that becomes very obvious upon opening the QNAP TS-421 is that there is ample space inside it for a PSU, which made the design decision to use an external power brick all the more ill considered. So much so that I felt I had to do something about it. It turns out the standard power brick it ships with fits just fine inside the case. Here is what it looks like fitted.
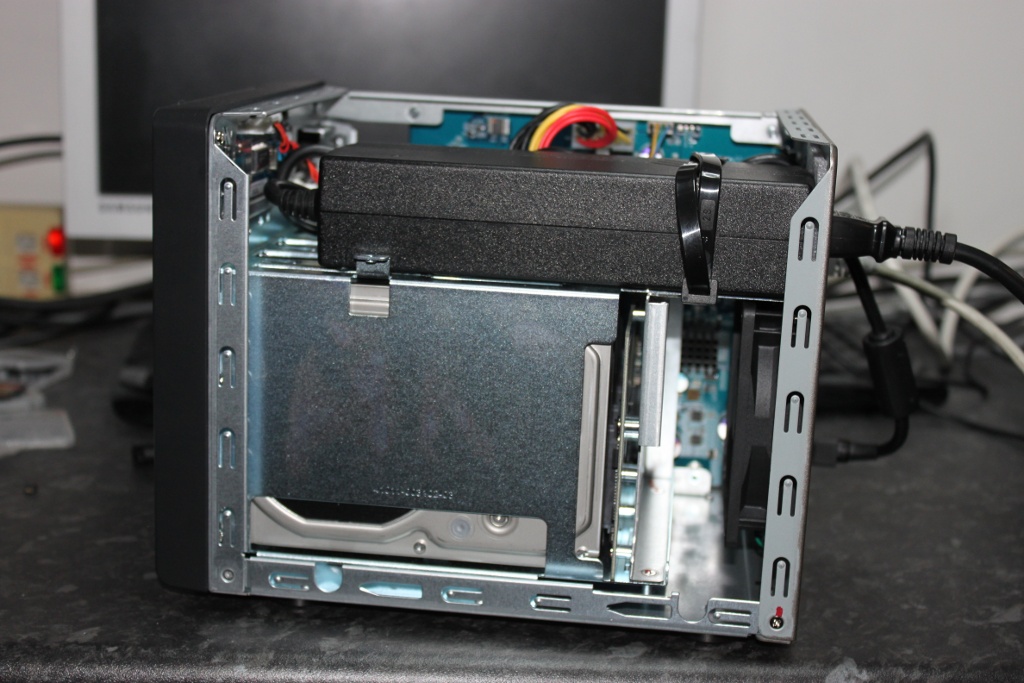

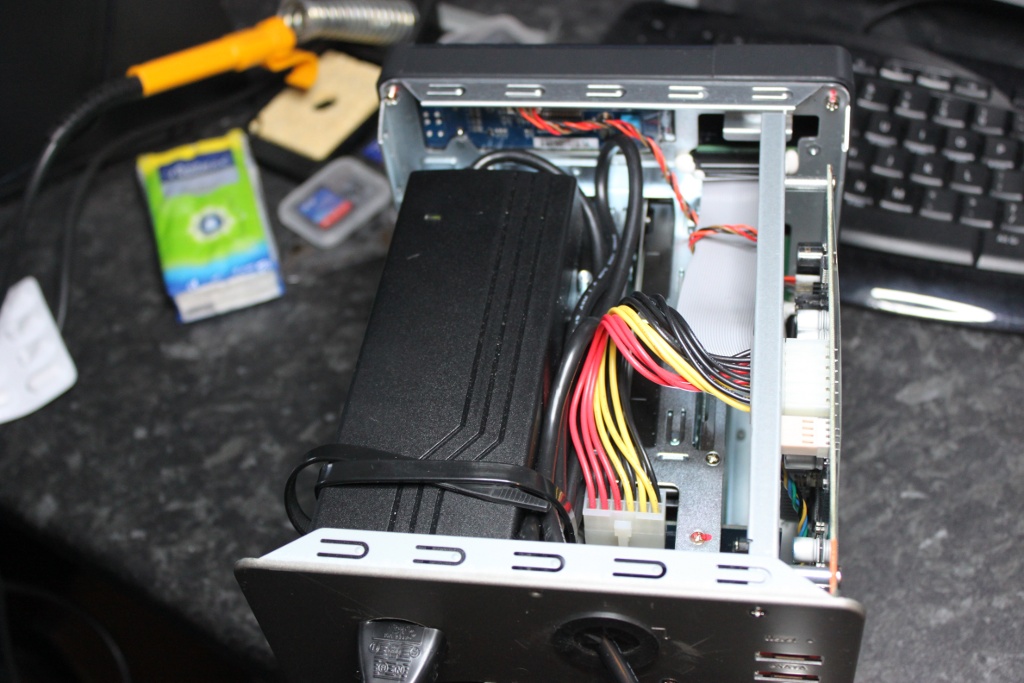
It is very securely attached using double sided foam tape. Make sure you make some kind of a gasket to fit between the PSU and the back of the case – this is in order to prevent upsetting the crefully designed airflow through the case. I used some 3mm thick expanded polyurethane which works very well for this purpose. The cable tie is there just for extra security and to tidy up the coiled up DC cable that goes back out of the case and into the motherboard’s power input port. This necessitated punching two 1 inch holes in the back of the case – one for the input power cable and one for the 12V DC output cable. I used a Q.Max 1 inch sheet metal hole punch to do this. There is an iris type grommet for the DC cable to prevent any potential damage arising from it rubbing on the metal casing.
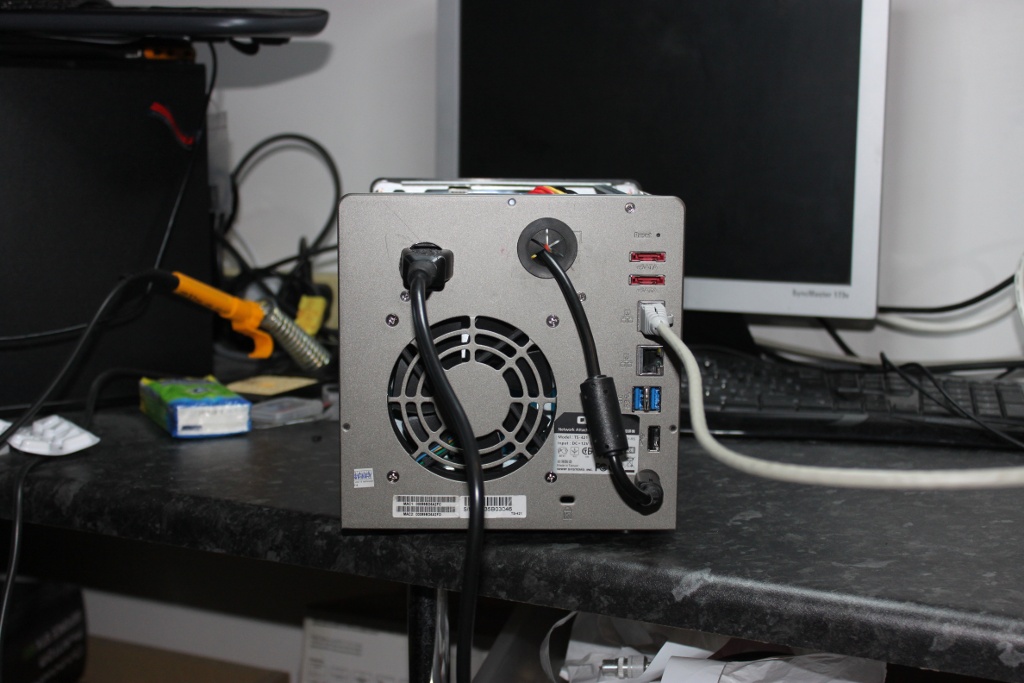
The finished modification looks reasonably tidy and is a vast improvement on a trailing power brick.
One other thing worth mentioning is that internalizing the PSU makes no measurable difference to internal temperatures with the case closed. In fact, if anything the PSU itself runs cooler than it does on the outside due to the cooling fan inside the case. The airflow inside the case is incredibly well designed, hence the reason why it is vital you use a gasket to seal the gap between the power input port on the PSU and the back of the case. To give you the idea of just how well the airflow is designed, with the case off, the HGST drives run at about 50-55C idle and 60-65C under load. With the case on they run at about 30C idle and 35C under full load (e.g. ZFS scrub or SMART self tests).